SpringBoot-自动装配
SpringBoot-自动装配
学习核心
- Spring自动装配原理拆解
学习资料
什么是Springboot?
Springboot提供了自动装配功能,以此简化spring配置;(SpringApplication的实例化)
Springboot内嵌了Servlet容器(如tomcat),可以直接启动 (run方法启动)
自动装配原理
Springboot版本2.7.6
1.Springboot入口
先构建一个最基础的Springboot项目,然后启动测试,从项目入口开始,拆解自动装配原理
Springboot启动类
@SpringBootApplication
public class DemoApplication {

    public static void main(String[] args) {
        SpringApplication.run(DemoApplication.class, args);
    }

}
Springboot自动配置原理核心(可以结合后面的核心注解进行详细拆解,此处阐述核心思路)
【1】Springboot项目中的启动类上的@SpringBootApplication注解为切入点,该注解对三个注解进行了封装
- @SpringBootConfiguration、@EnableAutoConfiguration、@ComponentScan
【2】其中**@EnableAutoConfiguration是自动化配置的核心注解,该注解通过@Import**(AutoConfigurationImportSelector.class)注解来导入对应的配置选择器
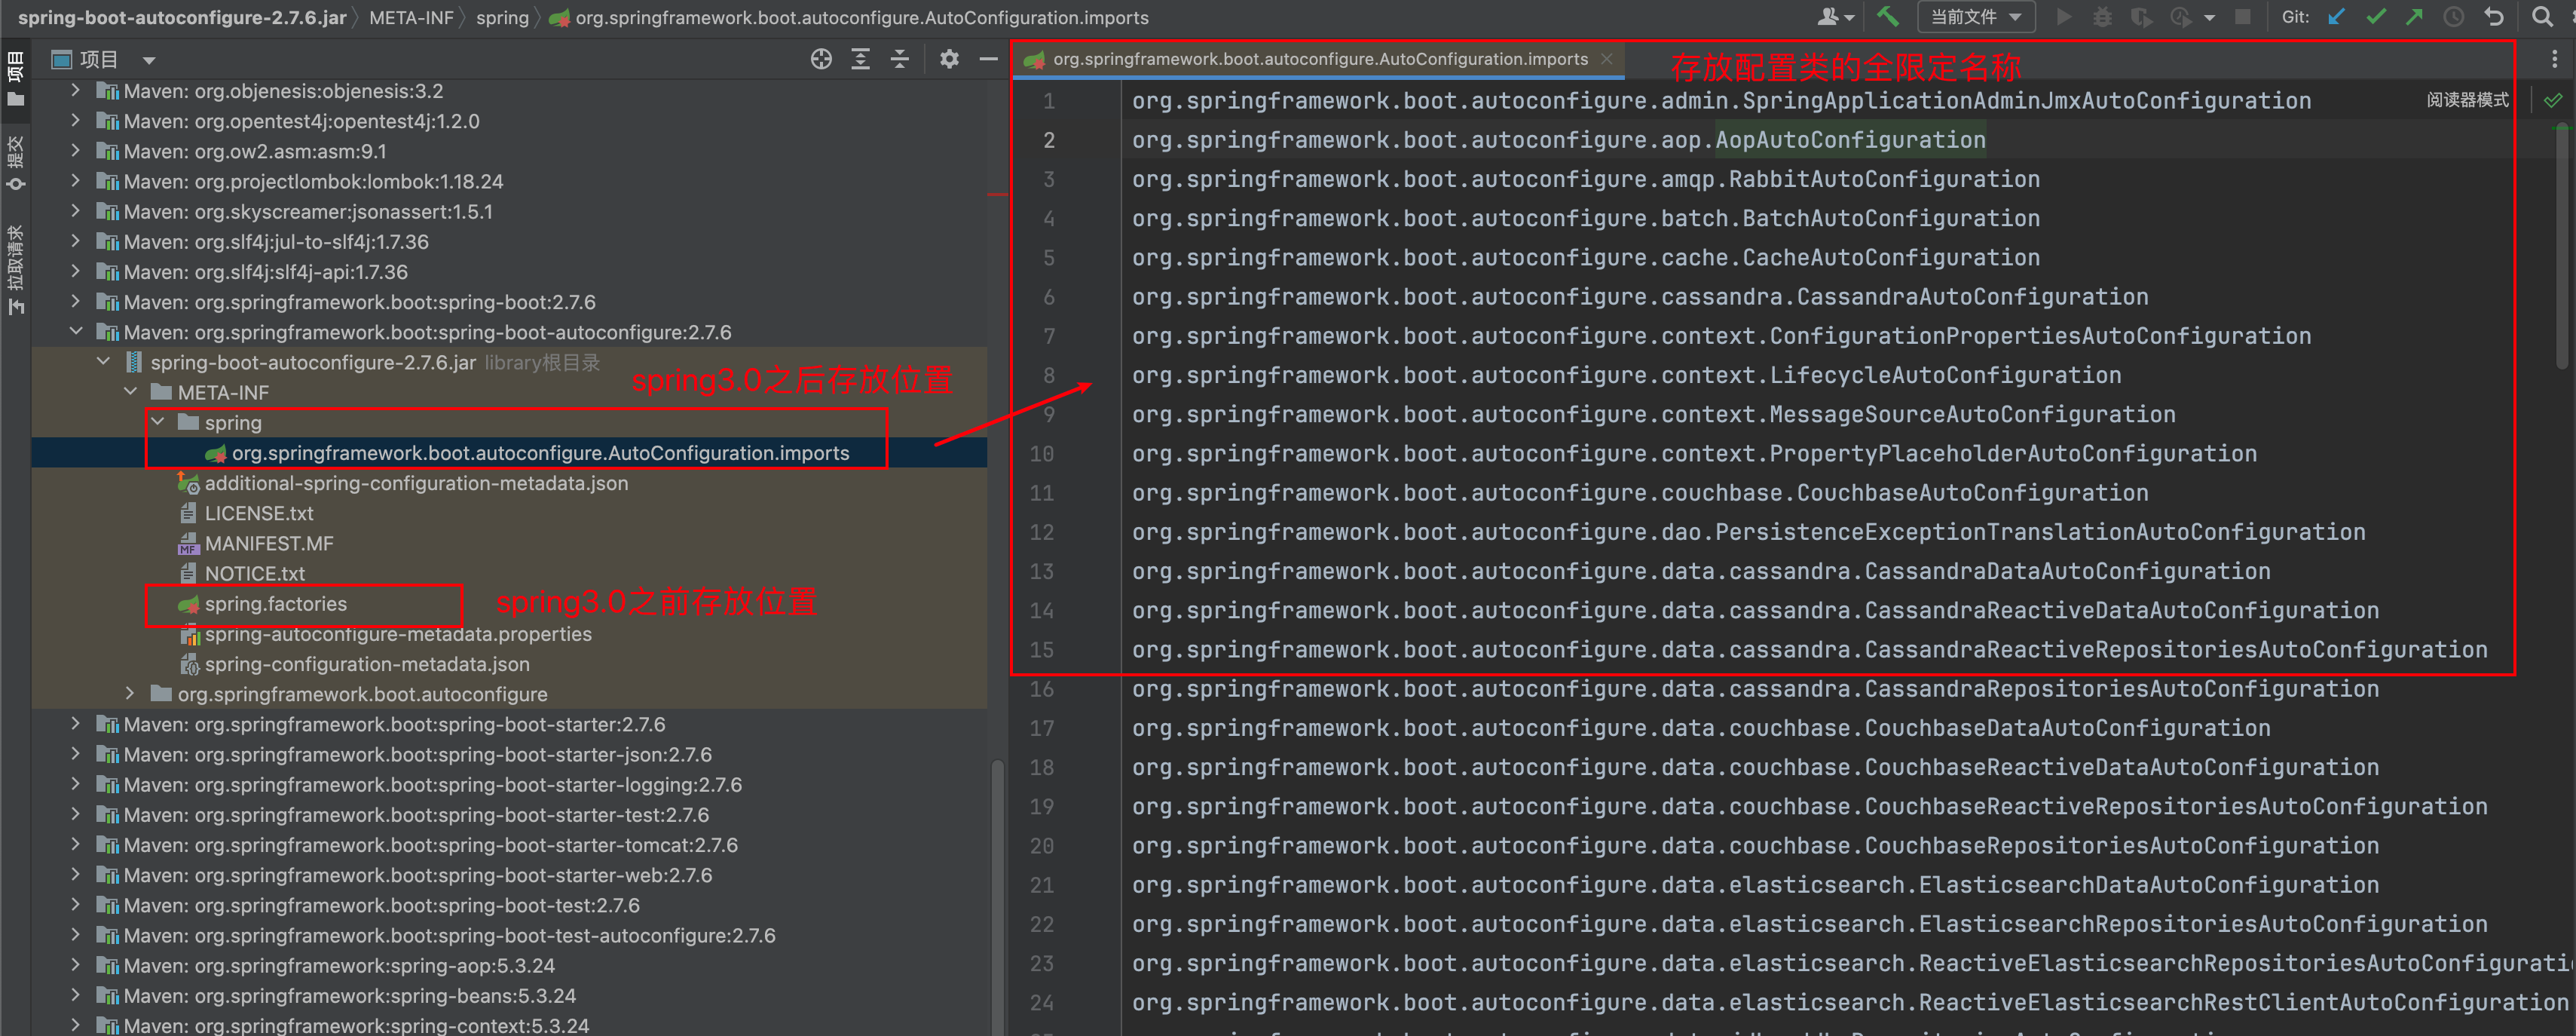
其内部实现就是读取了该项目和该项目引用的jar包的classpath路径下配置文件(3.0之前是META-INF/spring.factories文件;3.0之后是META-INF/spring/org.springframework.boot.autoconfigure.AutoConfiguration.imports文件)中所配置的类的全限定名称,在这些配置类中所定义的Bean会根据条件注解(所指定的条件)来决定是否要将其导入到Spring容器中(以RedisAutoConfiguration为例)
- 条件判断参考注解**@Conditional**
- @ConditionalOnClass 用于判断是否有对应的class文件(字节码文件),如果有则加载该类,并根据条件将这个配置类定义的Bean放入到Spring容器
- @ConditionalOnMissingBean 用于判断是否已经定义了指定的Bean,如果已存在则不需要加载默认的Bean到容器中
【3】Springboot的自动装配是Springboot已经加载了各种写好的Config类文件,实现这些JavaConfig配置文件的重复利用和组件化,只需要通过这个配置文件就可以获得程序需要的类,甚至不需要关心怎样获取项目启动所需要的类,只需要一个注解—— @EnableAutoConfiguration
2.核心注解
@SpringBootApplication
结合源码分析可以看到:@SpringBootApplication 等价于 @SpringBootConfiguration + @EnableAutoConfiguration + @ComponentScan
@Target({ElementType.TYPE})
@Retention(RetentionPolicy.RUNTIME)
@Documented
@Inherited
@SpringBootConfiguration
@EnableAutoConfiguration
@ComponentScan(
    excludeFilters = {@Filter(
    type = FilterType.CUSTOM,
    classes = {TypeExcludeFilter.class}
), @Filter(
    type = FilterType.CUSTOM,
    classes = {AutoConfigurationExcludeFilter.class}
)}
)
public @interface SpringBootApplication {
  ......
}
| 注解 | 说明 |
|---|---|
| @SpringBootConfiguration | 该注解和@Configuration注解作用相同,用于声明当前类是一个配置类 |
| @EnableAutoConfiguration | SpringBoot实现自动化配置的核心注解 |
| @ComponentScan | 组件扫描,默认扫描当前引导类所在包及其子包 |
@SpringBootConfiguration
@Configuration相当于一个spring的xml文件,配合@Bean注解,可以在里面配置需要Spring容器管理的bean
@Target({ElementType.TYPE})
@Retention(RetentionPolicy.RUNTIME)
@Documented
@Configuration
@Indexed
public @interface SpringBootConfiguration {
    @AliasFor(
        annotation = Configuration.class
    )
    boolean proxyBeanMethods() default true;
}
spring 3.0中增加了**@Configuration、@Bean**。可基于JavaConfig形式对 Spring 容器中的bean进行更直观的配置。SpringBoot推荐使用基于JavaConfig的配置形式
基于xml配置
<?xml version="1.0" encoding="UTF-8"?>
<beans xmlns="http://www.springframework.org/schema/beans"
       xmlns:xsi="http://www.w3.org/2001/XMLSchema-instance"
       xsi:schemaLocation="http://www.springframework.org/schema/beans  http://www.springframework.org/schema/beans/spring-beans-3.0.xsd"
       default-lazy-init="true">
    <bean id="mockService" class="..MockServiceImpl">
    ...
    </bean>
</beans>
基于JavaConfig配置
@Configuration
public class MockConfiguration{
    @Bean
    public MockService mockService(){
        return new MockServiceImpl();
    }
}
@ComponentScan
@ComponentScan用于配置扫描包路径
@ComponentScan通常与@Configuration一起配合使用,相当于xml里面的<context:component-scan>,用来告诉Spring需要扫描哪些包或类。如果不设值的话默认扫描@ComponentScan注解所在类的同级类和同级目录下的所有类,所以对于一个Spring Boot项目,一般会把入口类放在顶层目录中,这样就能够保证源码目录下的所有类都能够被扫描到
Spring提供两种方式配置扫描包,一种是基于xml配置、一种是基于JavaConfig配置
基于xml配置
<context:component-scan base-package="com.youzan" use-default-filters="false">
        <context:exclude-filter type="annotation" expression="org.springframework.stereotype.Controller"/>
</context:component-scan>
基于JavaConfig配置
@Configuration
@ComponentScan(value = "com.youzan", excludeFilters = {
        @ComponentScan.Filter(type = FilterType.ANNOTATION, classes = {Controller.class})
})
public class ScanConfig {

}
@EnableAutoConfiguration
@Target({ElementType.TYPE})
@Retention(RetentionPolicy.RUNTIME)
@Documented
@Inherited
@AutoConfigurationPackage
@Import({AutoConfigurationImportSelector.class})
public @interface EnableAutoConfiguration {
    String ENABLED_OVERRIDE_PROPERTY = "spring.boot.enableautoconfiguration";

    Class<?>[] exclude() default {};

    String[] excludeName() default {};
}
查看@EnableAutoConfiguration源码,跟踪到@Import({AutoConfigurationImportSelector.class}),这个**@Import**操作(AutoConfigurationImportSelector,自动配置导入选择器)会去加载Springboot的配置文件(spring-boot-autoconfigure),但这个文件中定义的配置类并不是所有的都会去加载(只有满足条件才会加载相应的内容)
这个配置文件根据Spring版本存放位置不同:3.0之前存放在META-INF/spring.factories、3.0之后存放在META-INF/spring/org.springframework.boot.autoconfigure.AutoConfiguration.imports文件
看到这种形式就会联想到Java的SPI机制,通过配置化形式动态加载类实现,进一步查看选择器的实现AutoConfigurationImportSelector(查看load方法:类似SPI动态加载的load概念,该方法也是通过读取配置进行动态加载)
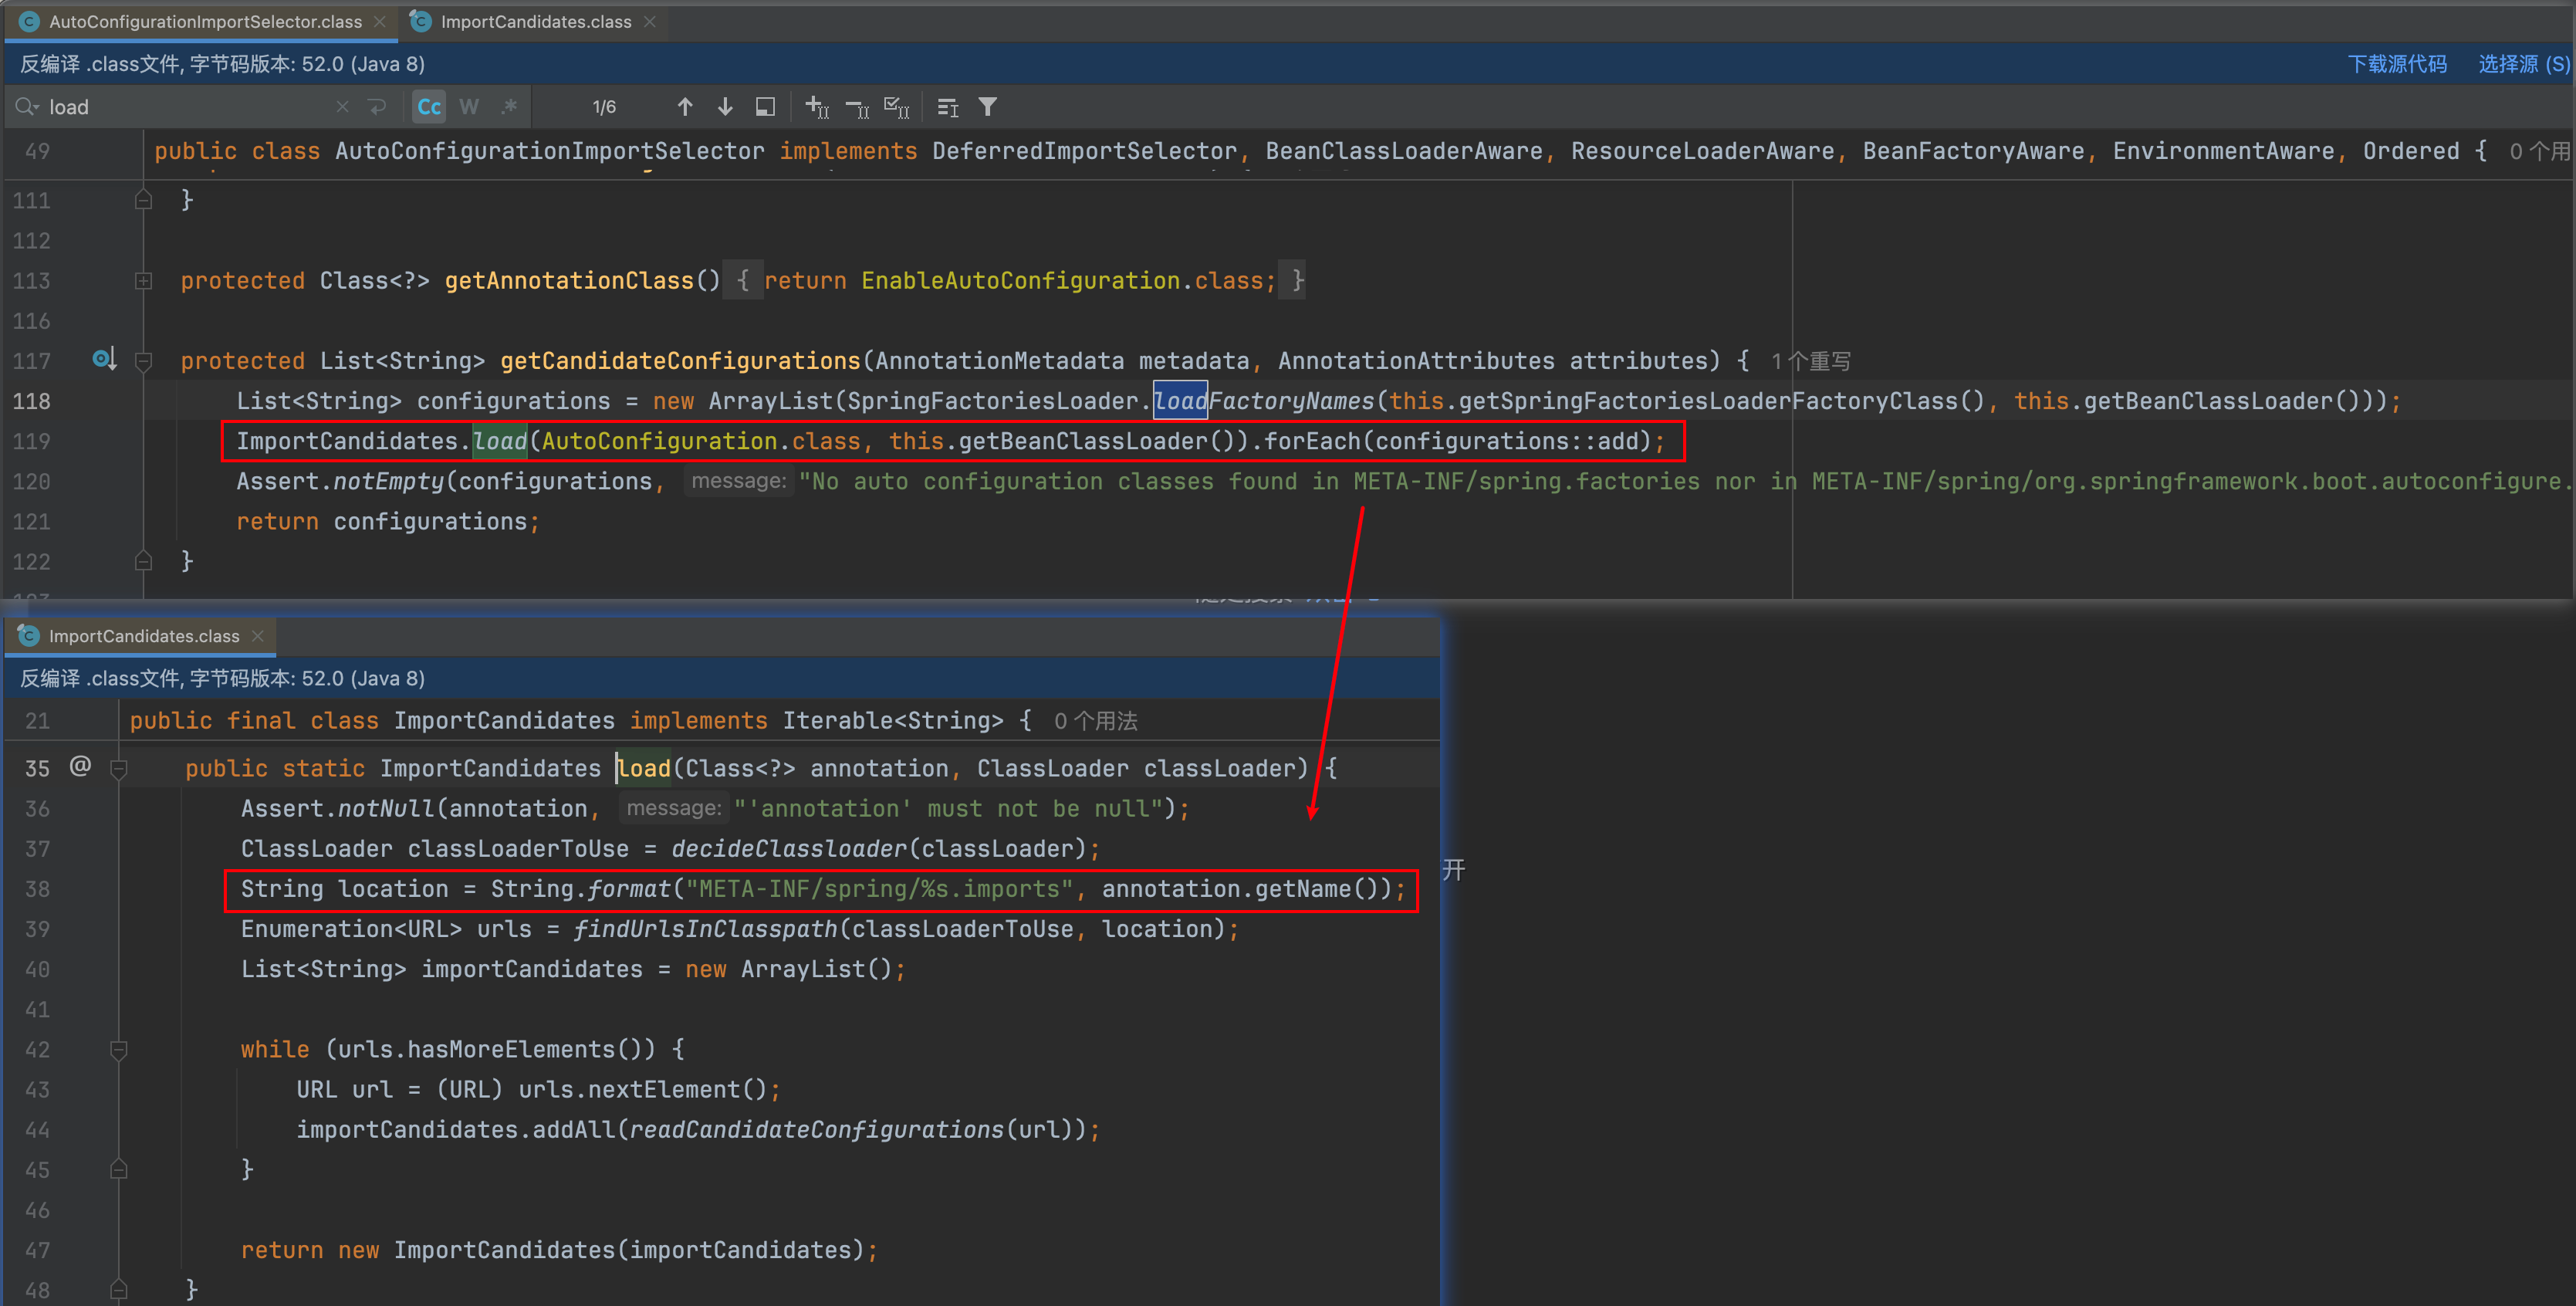
选择器的作用在于根据条件加载配置,因此并不是所有的配置都会被加载到容器中(会根据注解条件进行判断),可以从上述配置文件中随机选择一个类进行验证,以RedisAutoConfiguration为例,会先判断是否有对应字节码(当导入了redis相关的依赖之后就会有相应的.class文件),只有满足条件才会去加载RedisAutoConfiguration类放到Spring容器中。类似地,对于下述默认Bean对象的注册,也会先判断容器中是否已存在指定name的Bean对象,不存在才会去加载对应Bean到容器中

@Import
相当于xml里面的<import/>,允许导入 Configuration注解类 、ImportSelector 和 ImportBeanDefinitionRegistrar的实现类,以及普通的Component类
@Conditional
Spring Boot的强大之处在于使用了 Spring 4 框架的新特性:@Conditional注释,此注解使得只有在特定条件满足时才启用一些配置。这也 Spring Boot “智能” 的关键注解。Conditional 系列如下:
- @ConditionalOnBean
- @ConditionalOnClass
- @ConditionalOnExpression
- @ConditionalOnMissingBean
- @ConditionalOnMissingClass
- @ConditionalOnNotWebApplication
- @ConditionalOnResource
- @ConditionalOnWebApplication
以@ConditionalOnClass为例
@Target({ElementType.TYPE, ElementType.METHOD})
@Retention(RetentionPolicy.RUNTIME)
@Documented
@Conditional({OnClassCondition.class})
public @interface ConditionalOnClass {
    Class<?>[] value() default {};

    String[] name() default {};
}
其核心实现类为OnClassCondition.class,这个注解类实现Condition接口:
@FunctionalInterface
public interface Condition {
    // 决定是否满足条件的方法
    boolean matches(ConditionContext context, AnnotatedTypeMetadata metadata);
}
注解总结
上面所有的注解都在做一件事:注册bean到spring容器。通过不同的条件不同的方式来完成:
- @SpringBootConfiguration 通过与 @Bean 结合完成Bean的 JavaConfig配置;
- @ComponentScan 通过范围扫描的方式,扫描特定注解注释的类,将其注册到Spring容器;
- @EnableAutoConfiguration 通过 spring.factories 的配置,并结合 @Condition 条件,完成bean的注册;
- @Import 通过导入的方式,将指定的class注册解析到Spring容器;
Springboot的启动流程
分析关键方法:SpringApplication.run(DemoApplication.class, args);,对run方法进行源码跟踪:会发现其最终会构造一个SpringApplication实例然后运行其run方法
# SpringApplication#run
public static ConfigurableApplicationContext run(Class<?> primarySource, String... args) {
  return run(new Class[]{primarySource}, args);
}

# 最终定位执行的run方法
public static ConfigurableApplicationContext run(Class<?>[] primarySources, String[] args) {
  return (new SpringApplication(primarySources)).run(args);
}
进一步跟踪SpringApplication构造器的实现和初始化:
public SpringApplication(ResourceLoader resourceLoader, Class<?>... primarySources) {
  // ...... 省略一些初始化参数配置 ......
  this.primarySources = new LinkedHashSet(Arrays.asList(primarySources));
  // 1.判断应用类型是否为Web环境
  this.webApplicationType = WebApplicationType.deduceFromClasspath();
  this.bootstrapRegistryInitializers = new ArrayList(this.getSpringFactoriesInstances(BootstrapRegistryInitializer.class));
  // 2.设置初始化器(Initializers)
  this.setInitializers(this.getSpringFactoriesInstances(ApplicationContextInitializer.class));
  // 3.设置监听器(Listeners)
  this.setListeners(this.getSpringFactoriesInstances(ApplicationListener.class));
  // 4.推断应用入口类(Main)
  this.mainApplicationClass = this.deduceMainApplicationClass();
}
根据构造器的实现,依次定位对应的实现步骤(将核心代码实现和相关常量进行定义)
1.SpringApplication的实例化
(1)判断应用类型是否为Web环境
this.webApplicationType = WebApplicationType.deduceFromClasspath();
此处通过判断是否存在 Servlet 和 ConfigurableWebApplicationContext 类来判断是否是Web环境
# WebApplicationType 源码分析

private static final String[] SERVLET_INDICATOR_CLASSES = new String[]{"javax.servlet.Servlet", "org.springframework.web.context.ConfigurableWebApplicationContext"};

static WebApplicationType deduceFromClasspath() {
        if (ClassUtils.isPresent("org.springframework.web.reactive.DispatcherHandler", (ClassLoader)null) && !ClassUtils.isPresent("org.springframework.web.servlet.DispatcherServlet", (ClassLoader)null) && !ClassUtils.isPresent("org.glassfish.jersey.servlet.ServletContainer", (ClassLoader)null)) {
            return REACTIVE;
        } else {
            String[] var0 = SERVLET_INDICATOR_CLASSES;
            int var1 = var0.length;

            for(int var2 = 0; var2 < var1; ++var2) {
                String className = var0[var2];
                if (!ClassUtils.isPresent(className, (ClassLoader)null)) {
                    return NONE;
                }
            }

            return SERVLET;
        }
    }
(2)设置初始化器(Initializers)
this.setInitializers(this.getSpringFactoriesInstances(ApplicationContextInitializer.class));
此处设置的初始化器即ApplicationContextInitializer的实现类(可以查看ApplicationContextInitializer的源码定义和设置初始化器方法实现源码进行分析)
# 定位代码实现,代码解释

  // 此处的入参是ApplicationContextInitializer.class
private <T> Collection<T> getSpringFactoriesInstances(Class<T> type) {
  return this.getSpringFactoriesInstances(type, new Class[0]);
}

private <T> Collection<T> getSpringFactoriesInstances(Class<T> type, Class<?>[] parameterTypes, Object... args) {
  ClassLoader classLoader = this.getClassLoader();
  // 使用set集合保存name进行去重(避免重复配置导致多次实例化)
  Set<String> names = new LinkedHashSet(SpringFactoriesLoader.loadFactoryNames(type, classLoader));
  // 根据names进行实例化
  List<T> instances = this.createSpringFactoriesInstances(type, parameterTypes, classLoader, args, names);
  // 对实例进行排序(可使用Ordered接口 或者 使用@Order注解配置顺序)
  AnnotationAwareOrderComparator.sort(instances);
  return instances;
}
上述方法会加载所有配置的 ApplicationContextInitializer 并进行实例化,加载 ApplicationContextInitializer 是在SpringFactoriesLoader.loadFactoryNames 方法里面进行的,依次定位其源码实现:
# SpringFactoriesLoader#loadFactoryNames
public static List<String> loadFactoryNames(Class<?> factoryType, @Nullable ClassLoader classLoader) {
  ClassLoader classLoaderToUse = classLoader;
  if (classLoaderToUse == null) {
    classLoaderToUse = SpringFactoriesLoader.class.getClassLoader();
  }

  String factoryTypeName = factoryType.getName();
  return (List)loadSpringFactories(classLoaderToUse).getOrDefault(factoryTypeName, Collections.emptyList());
}


# SpringFactoriesLoader#loadSpringFactories
private static Map<String, List<String>> loadSpringFactories(ClassLoader classLoader) {
  Map<String, List<String>> result = (Map)cache.get(classLoader);
  if (result != null) {
    return result;
  } else {
    Map<String, List<String>> result = new HashMap();

    try {
      Enumeration<URL> urls = classLoader.getResources("META-INF/spring.factories");

      while(urls.hasMoreElements()) {
        URL url = (URL)urls.nextElement();
        UrlResource resource = new UrlResource(url);
        Properties properties = PropertiesLoaderUtils.loadProperties(resource);
        Iterator var6 = properties.entrySet().iterator();

        while(var6.hasNext()) {
          Map.Entry<?, ?> entry = (Map.Entry)var6.next();
          String factoryTypeName = ((String)entry.getKey()).trim();
          String[] factoryImplementationNames = StringUtils.commaDelimitedListToStringArray((String)entry.getValue());
          String[] var10 = factoryImplementationNames;
          int var11 = factoryImplementationNames.length;

          for(int var12 = 0; var12 < var11; ++var12) {
            String factoryImplementationName = var10[var12];
            ((List)result.computeIfAbsent(factoryTypeName, (key) -> {
              return new ArrayList();
            })).add(factoryImplementationName.trim());
          }
        }
      }

      result.replaceAll((factoryType, implementations) -> {
        return (List)implementations.stream().distinct().collect(Collectors.collectingAndThen(Collectors.toList(), Collections::unmodifiableList));
      });
      cache.put(classLoader, result);
      return result;
    } catch (IOException var14) {
      IOException ex = var14;
      throw new IllegalArgumentException("Unable to load factories from location [META-INF/spring.factories]", ex);
    }
  }
}
上述方法会尝试从类路径的 META-INF/spring.factories 读取相应配置文件并遍历,获取到:org.springframework.context.ApplicationContextInitializer 的 value。对应spring.factories文件的部分定义如下所示
# Initializers
org.springframework.context.ApplicationContextInitializer=\
org.springframework.boot.autoconfigure.SharedMetadataReaderFactoryContextInitializer,\
org.springframework.boot.autoconfigure.logging.ConditionEvaluationReportLoggingListener

# Application Listeners
org.springframework.context.ApplicationListener=\
org.springframework.boot.autoconfigure.BackgroundPreinitializer
读取到上述value值,将其作为names放入集合,并执行后续的实例化操作
private <T> List<T> createSpringFactoriesInstances(Class<T> type, Class<?>[] parameterTypes, ClassLoader classLoader, Object[] args, Set<String> names) {
  List<T> instances = new ArrayList(names.size());
  Iterator var7 = names.iterator();

  while(var7.hasNext()) {
    String name = (String)var7.next();

    try {
      Class<?> instanceClass = ClassUtils.forName(name, classLoader);
      Assert.isAssignable(type, instanceClass);
      Constructor<?> constructor = instanceClass.getDeclaredConstructor(parameterTypes);
      T instance = BeanUtils.instantiateClass(constructor, args);
      instances.add(instance);
    } catch (Throwable var12) {
      Throwable ex = var12;
      throw new IllegalArgumentException("Cannot instantiate " + type + " : " + name, ex);
    }
  }

  return instances;
}
上述方法的初始化步骤即进行类加载,得到其构造器进行初始化,然后放入到实例列表中
基于上述步骤拆解分析,也就解释了设置的初始化器即ApplicationContextInitializer的实现类,此处可以查看ApplicationContextInitializer源码
@FunctionalInterface
public interface ApplicationContextInitializer<C extends ConfigurableApplicationContext> {
    void initialize(C applicationContext);
}
ApplicationContextInitializer是一个回调接口,它会在 ConfigurableApplicationContext 容器 refresh() 方法调用之前被调用,做一些容器的初始化工作
(3)设置监听器(Listeners)
this.setListeners(this.getSpringFactoriesInstances(ApplicationListener.class));
其实现思路和Initializer类似,跟踪其源码实现(其实现思路和Initializer是类似的,也是读取文件配置,获取到相应的value进行加载)
# SpringApplication#getSpringFactoriesInstances

// 此处的入参是ApplicationListener
private <T> Collection<T> getSpringFactoriesInstances(Class<T> type) {
  return this.getSpringFactoriesInstances(type, new Class[0]);
}

private <T> Collection<T> getSpringFactoriesInstances(Class<T> type, Class<?>[] parameterTypes, Object... args) {
  ClassLoader classLoader = this.getClassLoader();
  Set<String> names = new LinkedHashSet(SpringFactoriesLoader.loadFactoryNames(type, classLoader));
  List<T> instances = this.createSpringFactoriesInstances(type, parameterTypes, classLoader, args, names);
  AnnotationAwareOrderComparator.sort(instances);
  return instances;
}
查看spring.factories配置文件,可以看到对应接口配置的实现类定义,然后将这个配置放入set集合进行实例化
# Application Listeners
org.springframework.context.ApplicationListener=\
org.springframework.boot.autoconfigure.BackgroundPreinitializer
跟踪ApplicationListener接口源码,它是Spring框架中一个基础的接口。该接口基于JDK中的 EventListener 接口,实现了观察者模式。对于 Spring 框架的观察者模式实现,它限定感兴趣的事件类型需要是 ApplicationEvent 类型的子类,而这个类同样是继承自JDK中的 EventObject 类。
@FunctionalInterface
public interface ApplicationListener<E extends ApplicationEvent> extends EventListener {
    void onApplicationEvent(E event);

    static <T> ApplicationListener<PayloadApplicationEvent<T>> forPayload(Consumer<T> consumer) {
        return (event) -> {
            consumer.accept(event.getPayload());
        };
    }
}
(4)推断应用入口类(Main)
this.mainApplicationClass = this.deduceMainApplicationClass();
跟踪其源码实现:它通过构造一个运行时异常,通过异常栈中方法名为main的栈帧来得到入口类的名字
private Class<?> deduceMainApplicationClass() {
  try {
    StackTraceElement[] stackTrace = (new RuntimeException()).getStackTrace();
    StackTraceElement[] var2 = stackTrace;
    int var3 = stackTrace.length;

    for(int var4 = 0; var4 < var3; ++var4) {
      StackTraceElement stackTraceElement = var2[var4];
      if ("main".equals(stackTraceElement.getMethodName())) {
        return Class.forName(stackTraceElement.getClassName());
      }
    }
  } catch (ClassNotFoundException var6) {
  }

  return null;
}
补充:获取堆栈信息的方式
Thread.currentThread().getStackTrace();
new RuntimeException().getStackTrace();
2.SpringApplication的run方法
public static ConfigurableApplicationContext run(Class<?>[] primarySources, String[] args) {
  return (new SpringApplication(primarySources)).run(args);
}

// 通过new的SpringApplication对象执行的run方法定位到其源码实现,进行源码分析
public ConfigurableApplicationContext run(String... args) {
  // 计时器:监控开发过程中的性能,不是生产应用程序的一部分
  long startTime = System.nanoTime();
  DefaultBootstrapContext bootstrapContext = this.createBootstrapContext();
  ConfigurableApplicationContext context = null;
  // 设置java.awt.headless系统属性,默认为true(Headless模式是系统的一种配置模式。在该模式下,系统缺少了显示设备、键盘或鼠标)
  this.configureHeadlessProperty();

  // 1.获取SpringApplicationRunListeners
  SpringApplicationRunListeners listeners = this.getRunListeners(args);
  listeners.starting(bootstrapContext, this.mainApplicationClass);

  Throwable ex;
  try {
    ApplicationArguments applicationArguments = new DefaultApplicationArguments(args);
    // 2.根据SpringApplicationRunListeners以及参数来准备环境
    ConfigurableEnvironment environment = this.prepareEnvironment(listeners, bootstrapContext, applicationArguments);
    this.configureIgnoreBeanInfo(environment);
    // 准备Banner打印器(启动Spring Boot的时候打印在console上的ASCII艺术字体)
    Banner printedBanner = this.printBanner(environment);
    // 3.创建Spring上下文
    context = this.createApplicationContext();
    context.setApplicationStartup(this.applicationStartup);
    // 4.Spring上下文前置处理
    this.prepareContext(bootstrapContext, context, environment, listeners, applicationArguments, printedBanner);
    // 5.Spring上下文刷新
    this.refreshContext(context);
    // 6.Spring上下文后置处理
    this.afterRefresh(context, applicationArguments);

    Duration timeTakenToStartup = Duration.ofNanos(System.nanoTime() - startTime);
    if (this.logStartupInfo) {
      (new StartupInfoLogger(this.mainApplicationClass)).logStarted(this.getApplicationLog(), timeTakenToStartup);
    }

    // 通知监听者开始启动
    listeners.started(context, timeTakenToStartup);
    this.callRunners(context, applicationArguments);
  } catch (Throwable var12) {
    ex = var12;
    this.handleRunFailure(context, ex, listeners);
    throw new IllegalStateException(ex);
  }

  try {
    Duration timeTakenToReady = Duration.ofNanos(System.nanoTime() - startTime);
    listeners.ready(context, timeTakenToReady);
    return context;
  } catch (Throwable var11) {
    ex = var11;
    this.handleRunFailure(context, ex, (SpringApplicationRunListeners)null);
    throw new IllegalStateException(ex);
  }
}
run方法涉及到的内容比较多,可以摘选关键步骤理解分析
(1)获取RunListeners
# 定位源码实现
private SpringApplicationRunListeners getRunListeners(String[] args) {
  Class<?>[] types = new Class[]{SpringApplication.class, String[].class};
  return new SpringApplicationRunListeners(logger, this.getSpringFactoriesInstances(SpringApplicationRunListener.class, types, this, args), this.applicationStartup);
}

# 定位 getSpringFactoriesInstances 方法实现
private <T> Collection<T> getSpringFactoriesInstances(Class<T> type, Class<?>[] parameterTypes, Object... args) {
  ClassLoader classLoader = this.getClassLoader();
  Set<String> names = new LinkedHashSet(SpringFactoriesLoader.loadFactoryNames(type, classLoader));
  List<T> instances = this.createSpringFactoriesInstances(type, parameterTypes, classLoader, args, names);
  AnnotationAwareOrderComparator.sort(instances);
  return instances;
}
从上述源码分析可知,其还是通过SPI机制动态完成类的动态加载,从META-INF/spring.factories 中读取Key为 org.springframework.boot.SpringApplicationRunListener 的Values(此处不过多赘述)
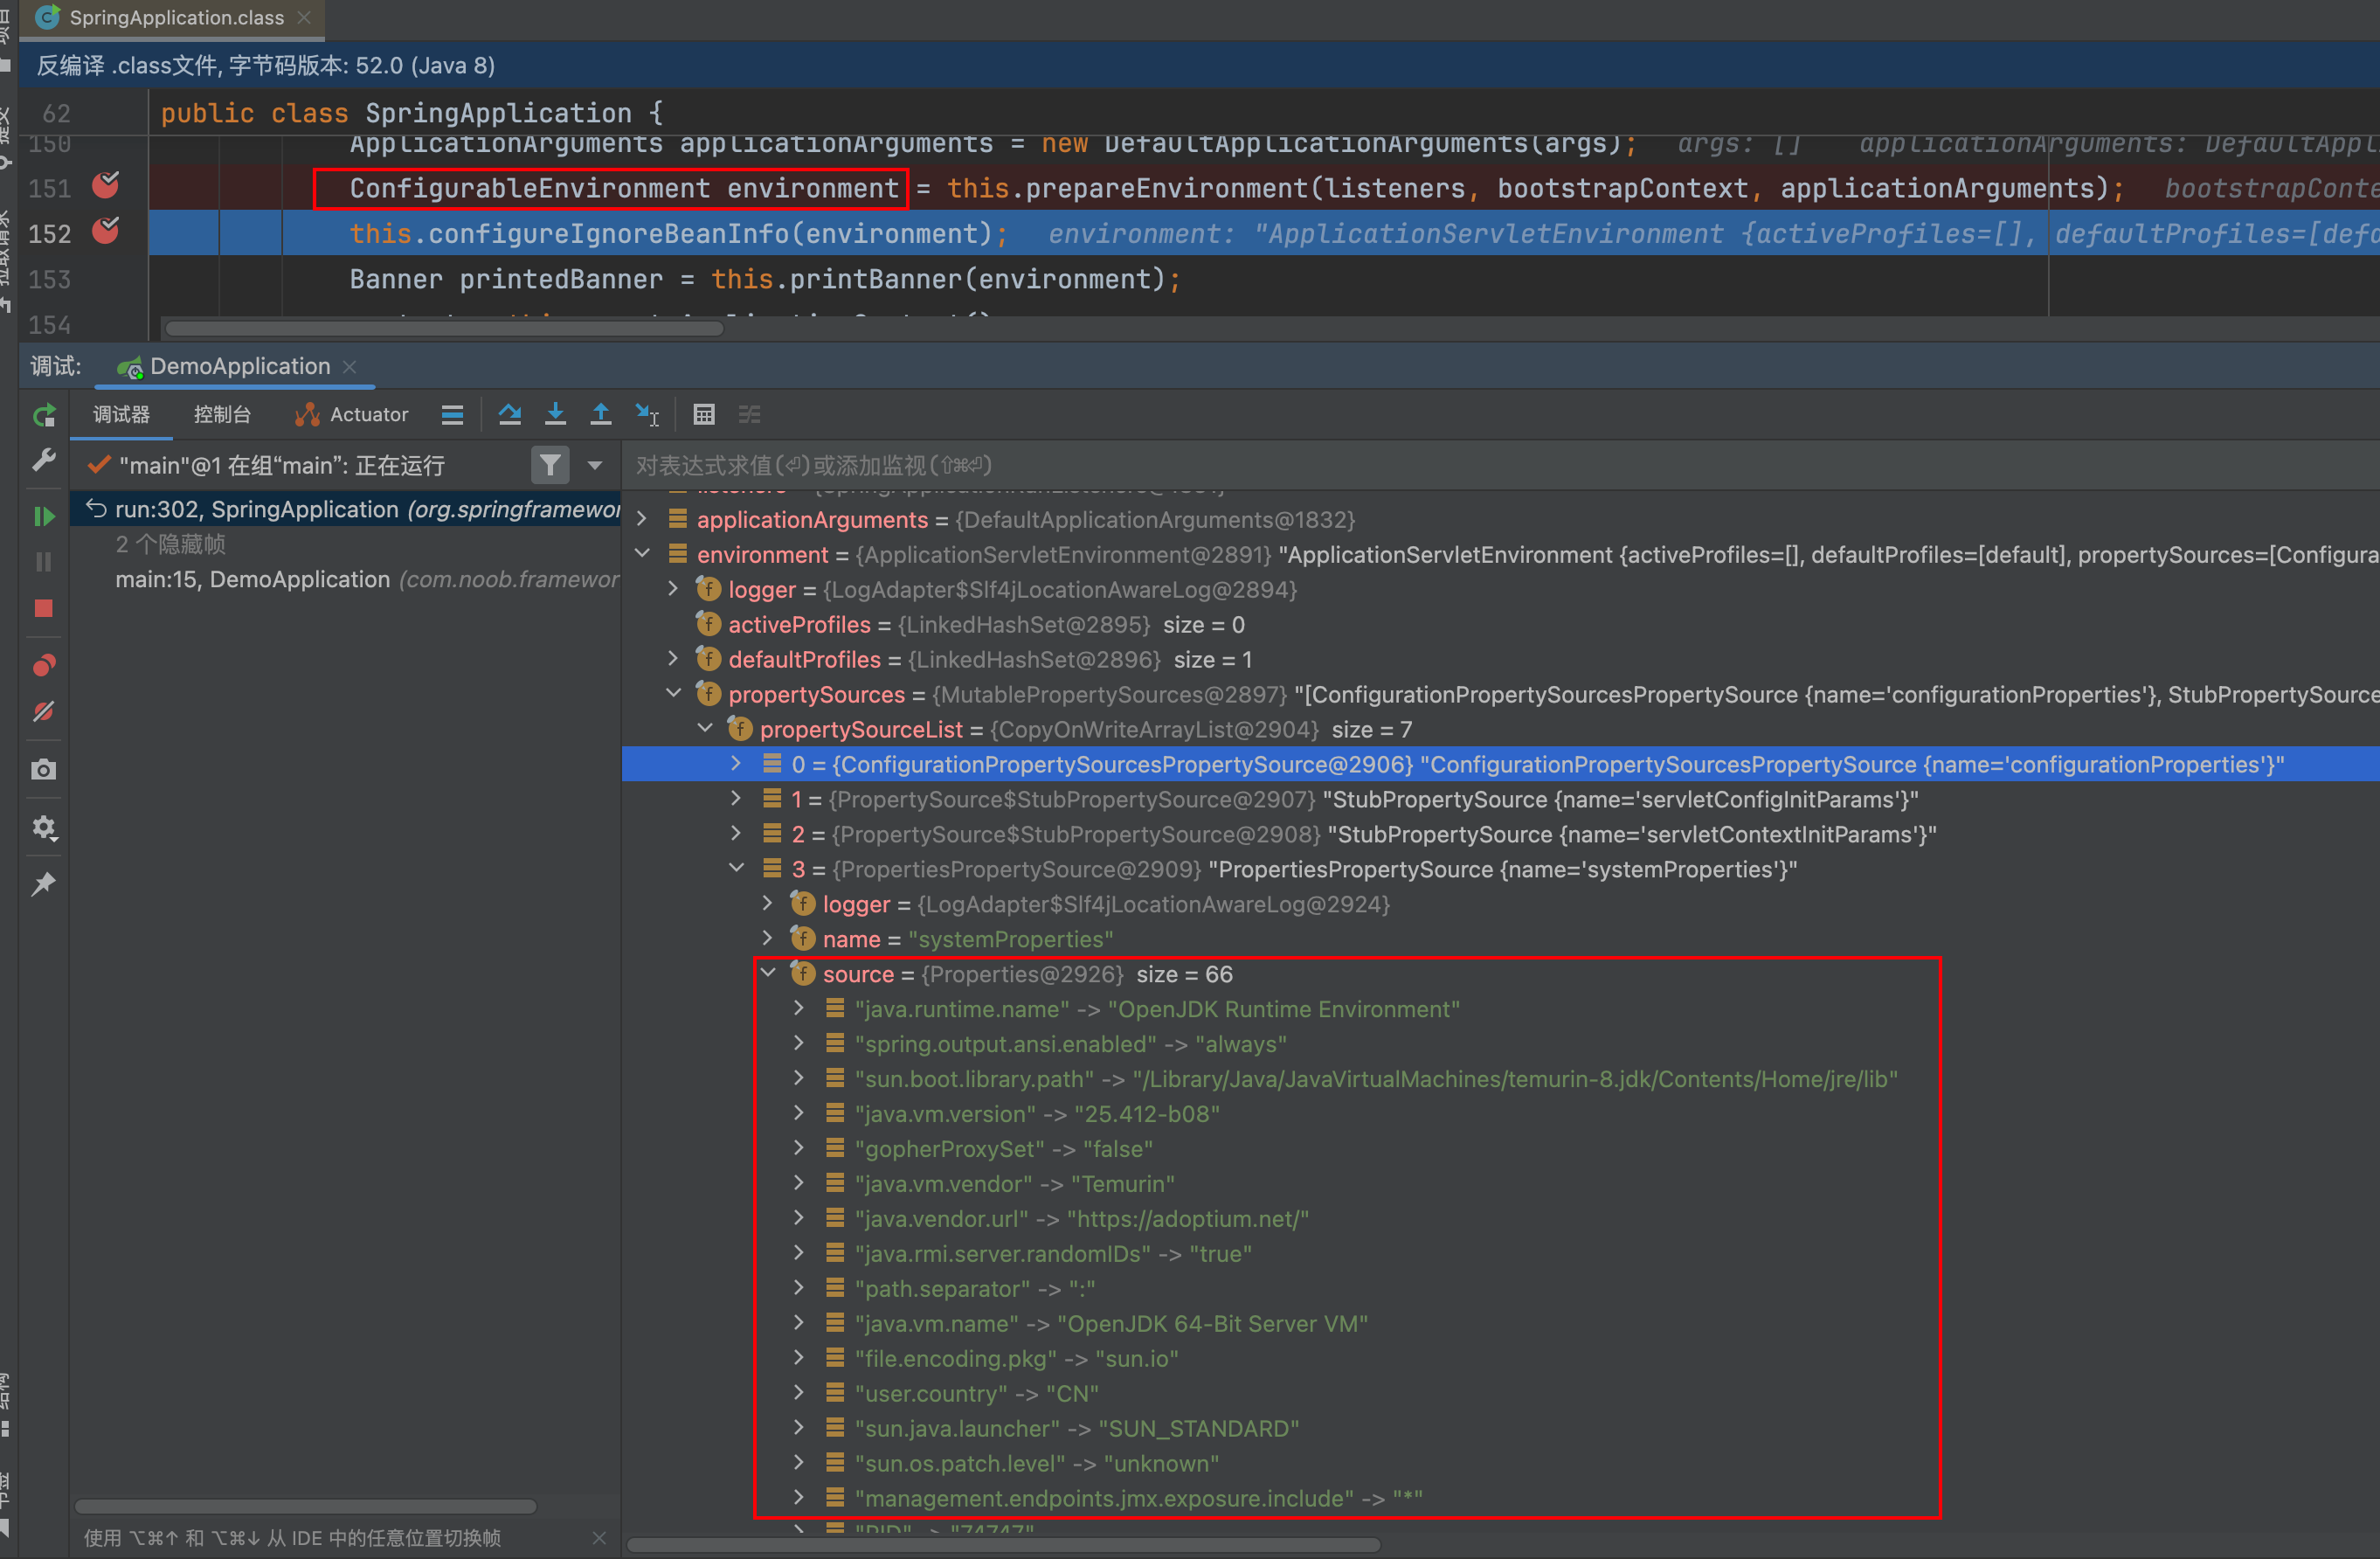
(2)准备Environment环境
# SpringApplication#prepareEnvironment
// 准备环境
private ConfigurableEnvironment prepareEnvironment(SpringApplicationRunListeners listeners, DefaultBootstrapContext bootstrapContext, ApplicationArguments applicationArguments) {
  ConfigurableEnvironment environment = this.getOrCreateEnvironment();
  // 1.环境配置
  this.configureEnvironment(environment, applicationArguments.getSourceArgs());
  ConfigurationPropertySources.attach(environment);
  // 2.调用前面获取到的listeners中的environmentPrepared方法
  listeners.environmentPrepared(bootstrapContext, environment);
  DefaultPropertiesPropertySource.moveToEnd(environment);
  Assert.state(!environment.containsProperty("spring.main.environment-prefix"), "Environment prefix cannot be set via properties.");
  this.bindToSpringApplication(environment);
  if (!this.isCustomEnvironment) {
    EnvironmentConverter environmentConverter = new EnvironmentConverter(this.getClassLoader());
    environment = environmentConverter.convertEnvironmentIfNecessary(environment, this.deduceEnvironmentClass());
  }

  ConfigurationPropertySources.attach(environment);
  return environment;
}

// --------------------------------- 执行步骤源码拆解 --------------------------------
// 1.环境配置
protected void configureEnvironment(ConfigurableEnvironment environment, String[] args) {
  if (this.addConversionService) {
    environment.setConversionService(new ApplicationConversionService());
  }

  this.configurePropertySources(environment, args);
  this.configureProfiles(environment, args);
}

// 2.listeners中的environmentPrepared方法
void environmentPrepared(ConfigurableBootstrapContext bootstrapContext, ConfigurableEnvironment environment) {
  this.doWithListeners("spring.boot.application.environment-prepared", (listener) -> {
    listener.environmentPrepared(bootstrapContext, environment);
  });
}
// 此处SpringApplicationRunListeners实际上是一个事件中转器,它能够感知到SpringBoot启动过程中产生的事件,然后有选择性的将事件进行中转
通过断点可以看到Springboot将相关环境配置加载进来了
(3)创建Spring Context(Spring上下文)
protected ConfigurableApplicationContext createApplicationContext() {
  return this.applicationContextFactory.create(this.webApplicationType);
}
(4)Spring Context 前置处理
# SpringApplication#prepareContext
private void prepareContext(DefaultBootstrapContext bootstrapContext, ConfigurableApplicationContext context, ConfigurableEnvironment environment, SpringApplicationRunListeners listeners, ApplicationArguments applicationArguments, Banner printedBanner) {
  // 将环境和上下文关联起来
  context.setEnvironment(environment);
  // 为上下文配置Bean生成器以及资源加载器(如果它们非空)
  this.postProcessApplicationContext(context);
  // 调用初始化器
  this.applyInitializers(context);
  // 触发Spring Boot启动过程的contextPrepared事件
  listeners.contextPrepared(context);
  bootstrapContext.close(context);
  if (this.logStartupInfo) {
    this.logStartupInfo(context.getParent() == null);
    this.logStartupProfileInfo(context);
  }

  // 添加两个Spring Boot中的特殊单例Beans - springApplicationArguments以及springBootBanner
  ConfigurableListableBeanFactory beanFactory = context.getBeanFactory();
  beanFactory.registerSingleton("springApplicationArguments", applicationArguments);
  if (printedBanner != null) {
    beanFactory.registerSingleton("springBootBanner", printedBanner);
  }

  if (beanFactory instanceof AbstractAutowireCapableBeanFactory) {
    ((AbstractAutowireCapableBeanFactory)beanFactory).setAllowCircularReferences(this.allowCircularReferences);
    if (beanFactory instanceof DefaultListableBeanFactory) {
      ((DefaultListableBeanFactory)beanFactory).setAllowBeanDefinitionOverriding(this.allowBeanDefinitionOverriding);
    }
  }

  if (this.lazyInitialization) {
    context.addBeanFactoryPostProcessor(new LazyInitializationBeanFactoryPostProcessor());
  }

  context.addBeanFactoryPostProcessor(new PropertySourceOrderingBeanFactoryPostProcessor(context));

  // 加载sources - 对于DemoApplication而言,这里的sources集合只包含了它一个class对象
  Set<Object> sources = this.getAllSources();
  Assert.notEmpty(sources, "Sources must not be empty");
  // 加载动作 - 构造BeanDefinitionLoader并完成Bean定义的加载
  this.load(context, sources.toArray(new Object[0]));
  // 触发Spring Boot启动过程的contextLoaded事件
  listeners.contextLoaded(context);
}

// --------------------------------- 执行步骤源码拆解 --------------------------------

// 为上下文配置Bean生成器以及资源加载器(如果它们非空)
protected void postProcessApplicationContext(ConfigurableApplicationContext context) {
  if (this.beanNameGenerator != null) {
    context.getBeanFactory().registerSingleton("org.springframework.context.annotation.internalConfigurationBeanNameGenerator", this.beanNameGenerator);
  }

  if (this.resourceLoader != null) {
    if (context instanceof GenericApplicationContext) {
      ((GenericApplicationContext)context).setResourceLoader(this.resourceLoader);
    }

    if (context instanceof DefaultResourceLoader) {
      ((DefaultResourceLoader)context).setClassLoader(this.resourceLoader.getClassLoader());
    }
  }

  if (this.addConversionService) {
    context.getBeanFactory().setConversionService(context.getEnvironment().getConversionService());
  }

}


// 调用初始化器(此处使用到SpringApplication实例初始化时设置的初始化器,并依次对其进行遍历,调用initialize方法)
protected void applyInitializers(ConfigurableApplicationContext context) {
  Iterator var2 = this.getInitializers().iterator();

  while(var2.hasNext()) {
    ApplicationContextInitializer initializer = (ApplicationContextInitializer)var2.next();
    Class<?> requiredType = GenericTypeResolver.resolveTypeArgument(initializer.getClass(), ApplicationContextInitializer.class);
    Assert.isInstanceOf(requiredType, context, "Unable to call initializer.");
    initializer.initialize(context);
  }

}
(5)Spring Context 刷新
# SpringApplication # refreshContext
private void refreshContext(ConfigurableApplicationContext context) {
  if (this.registerShutdownHook) {
    shutdownHook.registerApplicationContext(context);
  }

  this.refresh(context);
}

// --------------------------------- 执行步骤源码拆解 --------------------------------

// 调用父类的refresh方法
protected void refresh(ConfigurableApplicationContext applicationContext) {
  applicationContext.refresh();
}
(6)Spring Context 后置处理
protected void afterRefresh(ConfigurableApplicationContext context, ApplicationArguments args) {}

private void callRunners(ApplicationContext context, ApplicationArguments args) {
  List<Object> runners = new ArrayList();
  runners.addAll(context.getBeansOfType(ApplicationRunner.class).values());
  runners.addAll(context.getBeansOfType(CommandLineRunner.class).values());
  AnnotationAwareOrderComparator.sort(runners);
  Iterator var4 = (new LinkedHashSet(runners)).iterator();

  while(var4.hasNext()) {
    Object runner = var4.next();
    if (runner instanceof ApplicationRunner) {
      this.callRunner((ApplicationRunner)runner, args);
    }

    if (runner instanceof CommandLineRunner) {
      this.callRunner((CommandLineRunner)runner, args);
    }
  }

}

private void callRunner(ApplicationRunner runner, ApplicationArguments args) {
  try {
    runner.run(args);
  } catch (Exception var4) {
    Exception ex = var4;
    throw new IllegalStateException("Failed to execute ApplicationRunner", ex);
  }
}

private void callRunner(CommandLineRunner runner, ApplicationArguments args) {
  try {
    runner.run(args.getSourceArgs());
  } catch (Exception var4) {
    Exception ex = var4;
    throw new IllegalStateException("Failed to execute CommandLineRunner", ex);
  }
}
所谓的后置操作,就是在容器完成刷新后,依次调用注册的Runners。Runners可以是两个接口的实现类:
- org.springframework.boot.ApplicationRunner
- org.springframework.boot.CommandLineRunner
ApplicationRunner、CommandLineRunner接口是容器启动成功后的最后一步回调(类似开启自启动),进一步查看其源码,两个接口除了run方法接收的参数类型不一样其他都没什么不同
@FunctionalInterface
public interface ApplicationRunner {
    void run(ApplicationArguments args) throws Exception;
}

@FunctionalInterface
public interface CommandLineRunner {
    void run(String... args) throws Exception;
}
Springboot的自定义配置
基于上述原理分析,针对一些自定义配置,以更好地理解Springboot的流程,并了解Springboot提供了哪些扩展入口方便开发者对程序进行扩展
1.自定义初始化器
自定义初始化器(实现ApplicationContextInitializer接口)
package com.noob.framework.application;
import org.springframework.context.ApplicationContextInitializer;
import org.springframework.context.ConfigurableApplicationContext;
public class MyApplicationContextInitializer implements ApplicationContextInitializer<ConfigurableApplicationContext> {
@Override
public void initialize(ConfigurableApplicationContext applicationContext) {
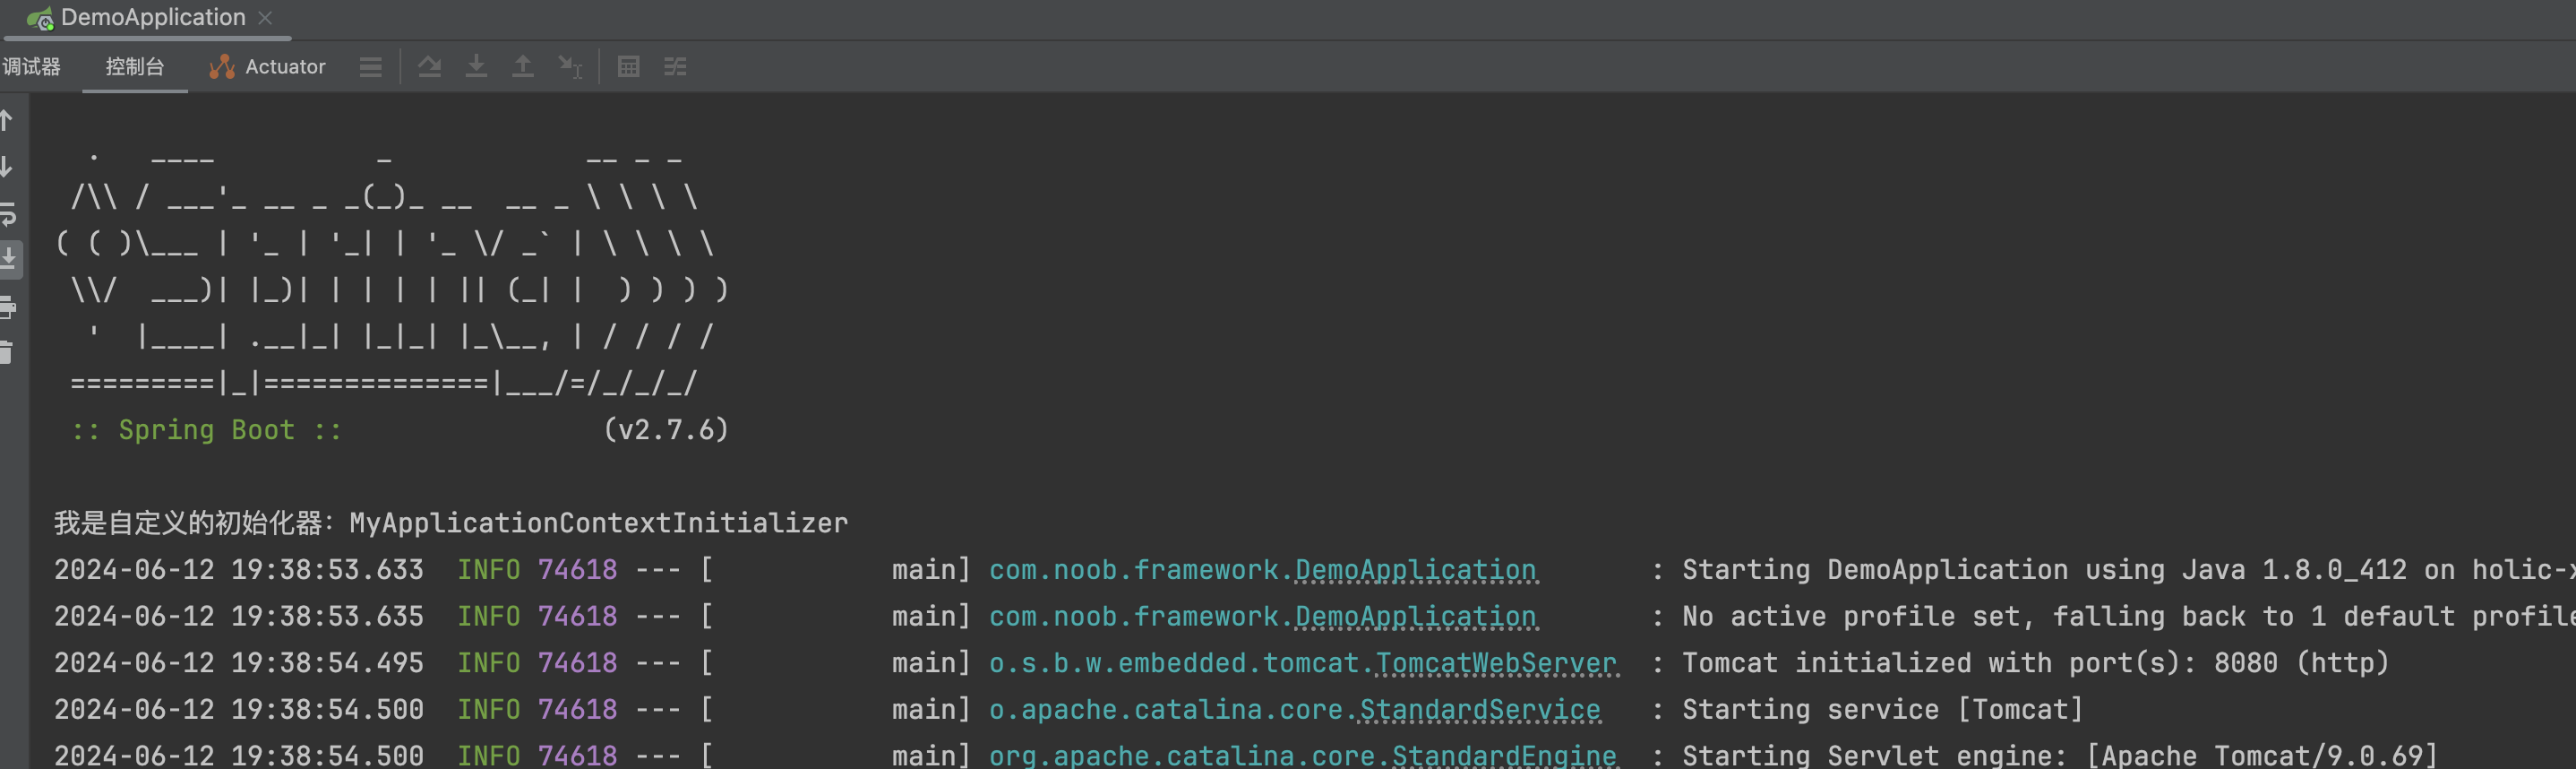
System.out.println("我是自定义的初始化器:MyApplicationContextInitializer");
}
}
初始化器注册(SPI配置注册、调用Springboot提供的方法在启动前注册)
- 方式1:SPI 配置 (类似源码分析启动原理的方式,通过SPI机制进行配置)
在resources/META-INF/spring.factories 下配置
org.springframework.context.ApplicationContextInitializer=\
com.noob.framework.application.MyApplicationContextInitializer
- 方式2:借助addInitializers方法进行注册
@SpringBootApplication
public class DemoApplication {
    public static void main(String[] args) {
        SpringApplication app = new SpringApplication(DemoApplication.class);
        app.addInitializers(new MyApplicationContextInitializer());
        app.run(args);
    }
}
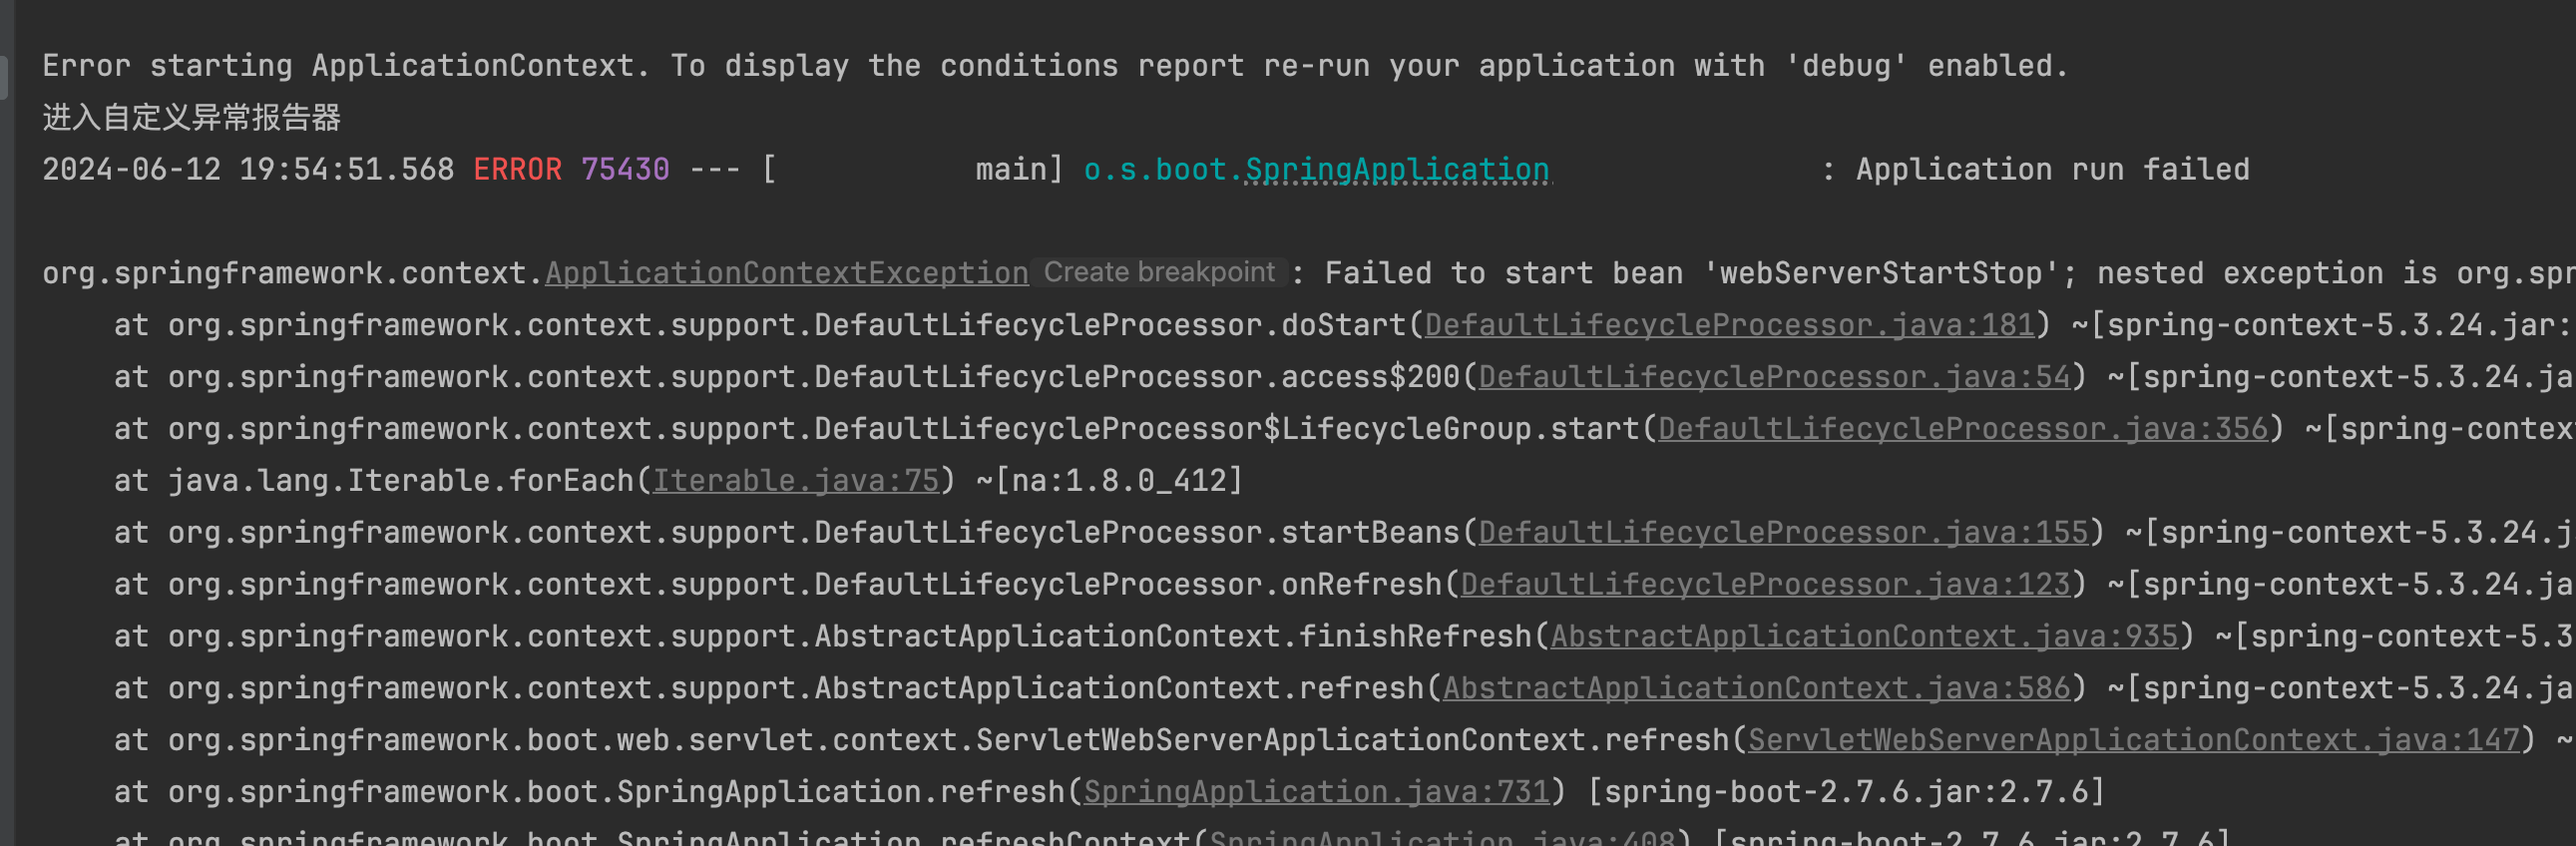
2.自定义异常报告器
异常报告器只会捕获启动过程中抛出的异常,如果是启动完成后用户请求报错的情况,异常报告器不会捕获请求中出现的异常
类似地,其自定义步骤和自定义初始化器过程类似
- 自定义异常报告器实现SpringBootExceptionReporter接口
// 自定义异常报告器
public class MyExceptionReporter implements SpringBootExceptionReporter {

    private ConfigurableApplicationContext context;

    // 必须要有一个有参的构造函数,否则启动会报错
    MyExceptionReporter(ConfigurableApplicationContext context) {
        this.context = context;
    }

    @Override
    public boolean reportException(Throwable failure) {
        System.out.println("进入自定义异常报告器");
        failure.printStackTrace();
        // 返回false会打印详细springboot错误信息,返回true则只打印异常信息
        return false;
    }
}
- 通过SPI配置注册(在resources/META-INF/spring.factories 下配置)
org.springframework.boot.SpringBootExceptionReporter=\
com.noob.framework.application.MyExceptionReporter
- 异常测试:将启动端口设置为一个很大的值(applicaton.yml),然后尝试启动项目
server:
  port: 80800000
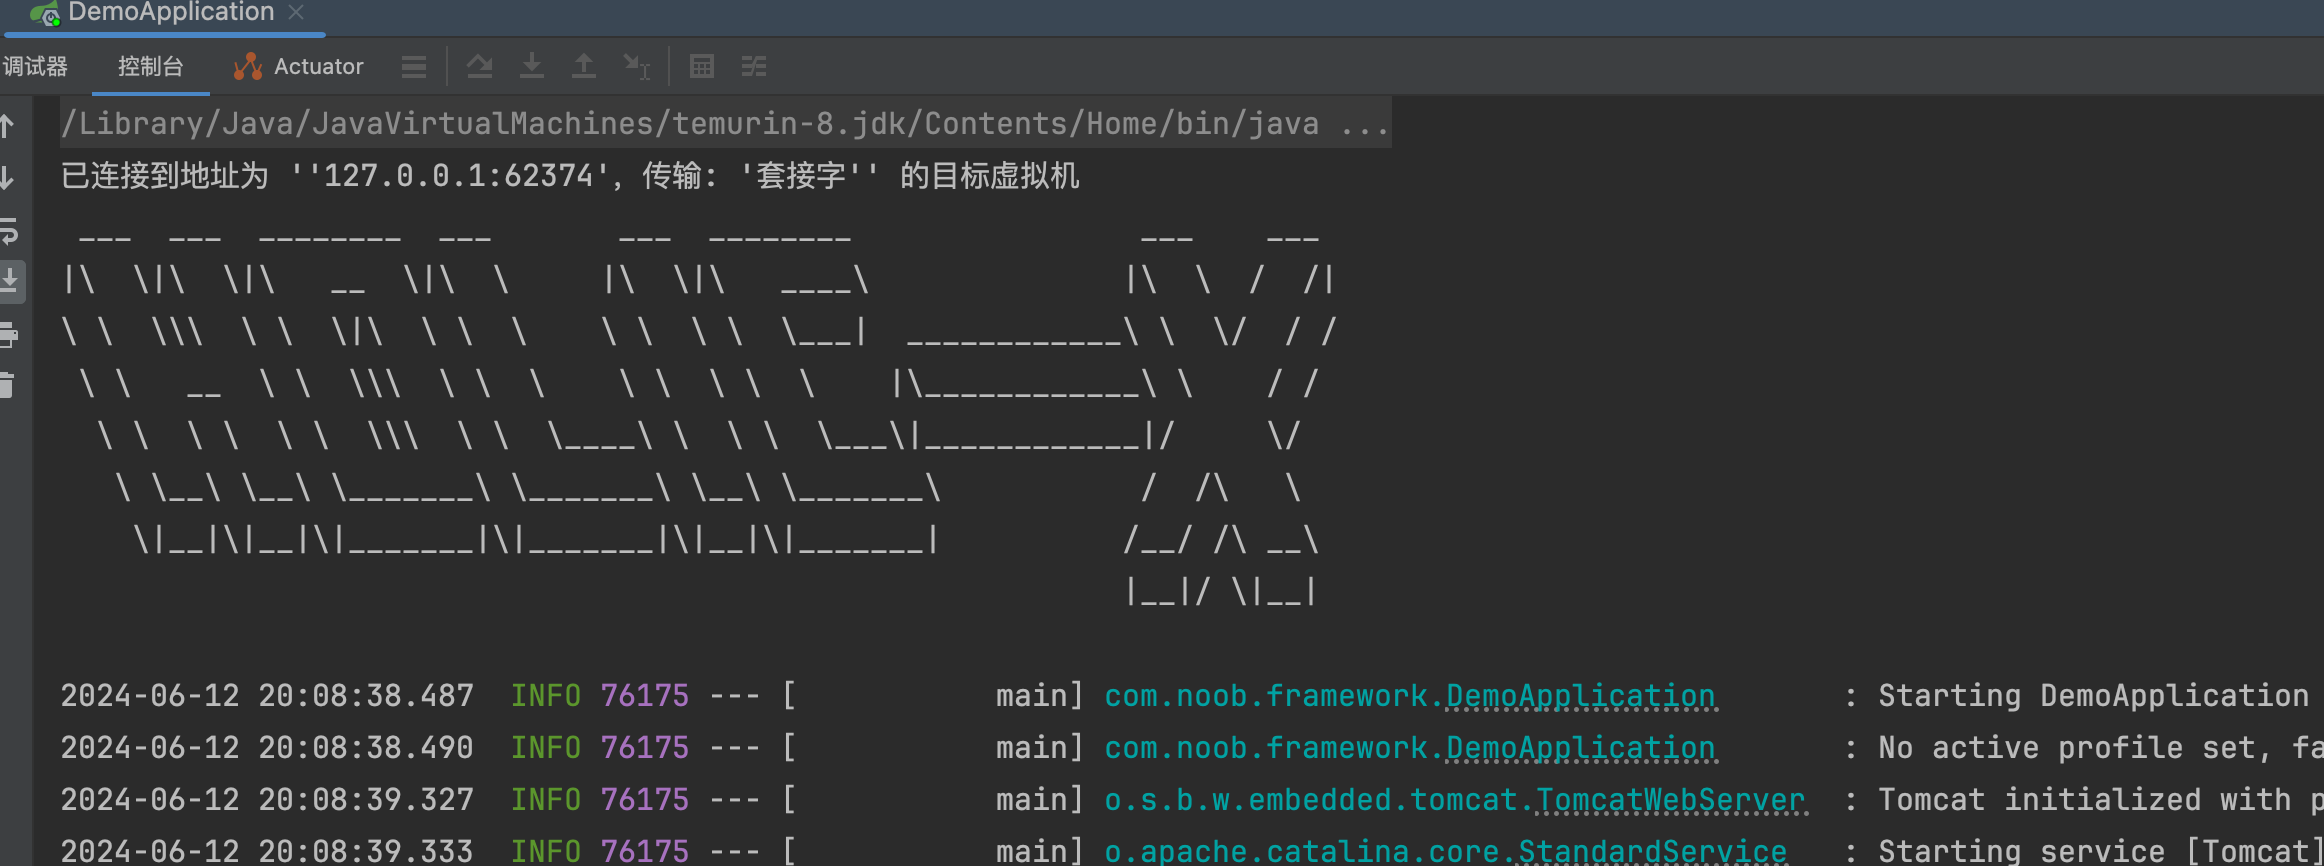
3.自定义banner信息
修改banner的方式有多种,如果要关闭banner则在application.yml中配置
spring:
  main:
    banner-mode: off
如果是要修改banner的内容,则在resources下创建banner.txt文件,里面存放banner信息即可(如果没有指定该文件,则使用默认的banner)
 ___  ___  ________  ___       ___  ________                ___    ___
|\  \|\  \|\   __  \|\  \     |\  \|\   ____\              |\  \  /  /|
\ \  \\\  \ \  \|\  \ \  \    \ \  \ \  \___|  ____________\ \  \/  / /
 \ \   __  \ \  \\\  \ \  \    \ \  \ \  \    |\____________\ \    / /
  \ \  \ \  \ \  \\\  \ \  \____\ \  \ \  \___\|____________|/     \/
   \ \__\ \__\ \_______\ \_______\ \__\ \_______\           /  /\   \
    \|__|\|__|\|_______|\|_______|\|__|\|_______|          /__/ /\ __\
                                                           |__|/ \|__|
4.执行自定义的run方法
callRunners(context, applicationArguments) 可以在启动完成后执行,而针对自定义的run方法有两种实现方式:
- 实现 ApplicationRunner 接口
- 实现 CommandLineRunner 接口
自定义类实现接口(用于启动完成后执行)
@Component
public class MyApplicationRunner implements ApplicationRunner {
    @Override
    public void run(ApplicationArguments args) throws Exception {
        System.out.println("hello 我是MyApplicationRunner");
    }
}
@Component
public class MyCommandLineRunner implements CommandLineRunner {
    @Override
    public void run(String... args) throws Exception {
        System.out.println("hello 我是MyCommandLineRunner");
    }
}

也可以同时实现两个接口
@Component
public class MyRunner implements ApplicationRunner,CommandLineRunner {

    @Override
    public void run(ApplicationArguments args) throws Exception {
        System.out.println("hello ApplicationRunner");
    }

    @Override
    public void run(String... args) throws Exception {
        System.out.println("hello CommandLineRunner");
    }
}